The one that started it all...
My Weizenbock is fermenting happily on our kitchen shelf next to some salvaged, pry-off bottles that it will go into this weekend. The two-handled thing is the bottle capper.
And the fermentor that we made ourselves.
A good fermentor only has two requirements: it can hold liquid, and have some method of allowing gases to escape, while not letting any bad nasties in. We used a rubber stopper and airlock setup. The liquid in the airlock is vodka. You want something that won't harbor bacteria.
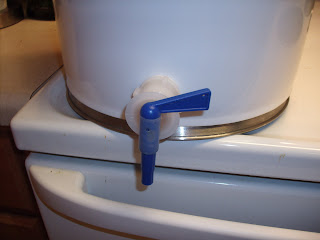
In order to avoid buying (and having to store) any siphon equipment, I recommend installing a bottling spigot on the fermentor as well. If the bottom of the spigot inlet is about 1/2 inch from the bottom of the bucket, you should be safe from getting any trub (gunk from the bottom) in your bottles. Also, avoid the spring-loaded spigots, as the spring will lose tension over time and you will lose your airtight seal.
I got the bucket and lid from usplastics.com and the stopper, airlock, and spigot from stompthemgrapes.com. All together with shipping, it was about $20. Also, you will need a 1 inch spade drill bit and an electric drill to make the holes in your bucket.


Also, from previous experience, make sure the lid you buy is the "Easy Remove" type. Otherwise, you will be seriously challenged in getting the lid on and off without making a BIG mess!!!
ReplyDeleteGreat post, thanks for the tips...I hope to start my own soon!
ReplyDeleteMH
My first comments! Oh happy day!
ReplyDelete